Building and editing
Learn how to start building your first form.
Contents
- Naming your form(same page)
- Your initial view and pages(same page)
- Choosing the right start page(same page)
- Footer pages(same page)
- Previewing your pages(same page)
- Adding pages(same page)
- Moving pages(same page)
- Editing pages(same page)
- Deleting pages(same page)
- Choosing the type of page(same page)
- Choosing which question format to use(same page)
- Presenting users with a long list of options(same page)
- Asking users to submit a file(same page)
- Making a question optional(same page)
- Validating user answers(same page)
- Formatting content with markdown(same page)
- Targeting content with visibility(same page)
- Translating a form into Welsh(same page)
Naming your form
When you create a new form, you need to give it a name.
This name is:
- what your form will be listed as in the MoJ Forms editor
- the title that will appear in your form's header
- used to create your form's default URL
A name can be up to 255 characters, including spaces.
Your form's name is important. It affects how people find your form (through search, for example) and helps them understand what it's for and if it's right for them.
A good name should:
- describe a task, not a team or department
- use the same words your users would choose
- start with an action, such as "Get help with..." or "Apply for..."
- be in sentence case (only capitalise the first word and proper nouns)
Examples of government service names include:
- Register to vote
- Get help with court fees
- Renew your passport
Don't worry if you are not sure what to call it at this stage. You will be able to change your name and URL in settings later.
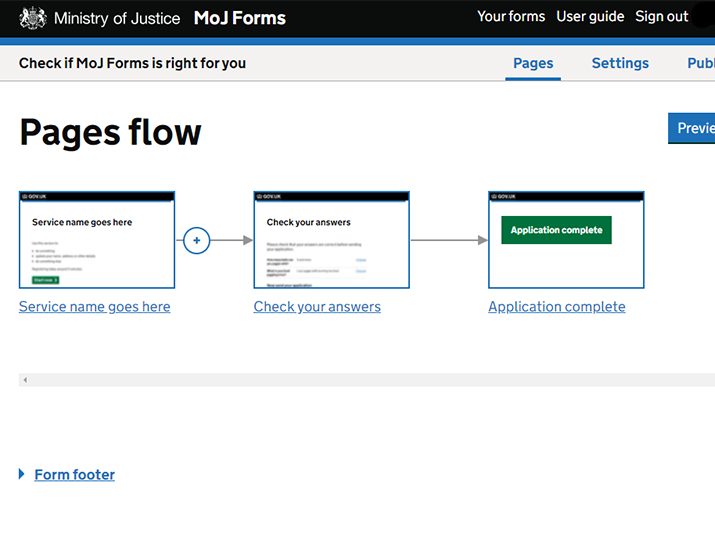
Your initial view and pages
When you create a new form, you are taken to your form's 'pages flow' or flow view. This shows how all the pages link together and is where you will build and edit your form. Most actions, such as adding and deleting pages, editing pages and creating branching, are done from the flow view.
You are given some default pages to help you structure your form:
- start page
- check answers page
- confirmation page
The form footer section also contains some pages which are required for your form and linked from your form's footer section.
The start page is your form's home page. It cannot be deleted but you can replace it with a GOV.UK start page.
All your form's question pages should come after the start page and before the check answers page.
Check answers and confirmation pages
For your form to successfully submit the user data it collects, it must have a check answers page and a confirmation page. A form can have only one check answers page and one confirmation page. If you need to show different versions of these pages to your users, you may be able to achieve this effect with the visibility setting.
Choosing the right start page
Your form must have a start page. This is the starting point for your users. It should explain what the form is for, what information is required and whether there are any other ways to access the service you provide.
You can choose between 2 types of start page:
- an MoJ Forms start page - which you create as part of your form
- a GOV.UK start page - which a GOV.UK publisher would create for you on GOV.UK
When to use an MoJ Forms start page
This is the default start page for every new form. You should use this start page unless you want your users to access your form from GOV.UK and all the information users need before starting your form will be on GOV.UK.
The MoJ Forms start page has some hints on what information to include. To find out more about what should go on your start page, read the Design System guidance on start pages.
When to use a GOV.UK start page
If your form is for an external audience, such as members of the public or a group of professionals, it may need a GOV.UK start page.
GOV.UK services must start on a GOV.UK content page. This links your service to the rest of GOV.UK, and means that users can find it using search or through GOV.UK’s navigation.
A GOV.UK start page may use a number of different templates depending on where on GOV.UK it will sit and what content is required.
You should talk to your local GOV.UK publishing team to decide:
- whether you need to link to your form from GOV.UK
- where on GOV.UK it should link from
- what to include on your start page
- what other guidance or information your users may need
- whether to use a GOV.UK start page or an MoJ Forms start page
If your form is aimed at members of the public and will sit under services and information (sometimes called 'mainstream' content), your local GOV.UK publishing team will need to raise a request with the Government Digital Service (GDS) to make the changes.
How to switch to a GOV.UK start page
From the flow view, open the start page page menu (...) and select 'Switch to GOV.UK start page'.
You will then be asked for a GOV.UK start page URL which you will get from your local GOV.UK publishing team.
When you switch to a GOV.UK start page, several things happen:
- your existing MoJ Forms start page is removed - but it's saved in the background and can be retrieved at any time by switching back
- links to the start page, such as in your form's header, are updated to point to the GOV.UK URL
You can test the URL is working in MoJ Forms by selecting 'Open start page' in the page menu. Bear in mind the link may not work or look correct until the GOV.UK publishing team push their work live.
The menu also includes an option to 'Edit start page URL'.
How to switch back to an MoJ Forms start page
From the flow view, open the start page menu (...) and select 'Switch to form start page'.
Footer pages
Your form contains 3 pages that are linked from the footer section of every page of your form. These can be seen in the flow view under the heading of "form footer". They are:
- Cookies
- Privacy
- Accessibility
These pages are required for every form so cannot be deleted or moved.
The cookies page doesn't require any input from you so can't be edited. However, the privacy and accessibility pages contain boilerplate copy with sections in square brackets - [like this] - that you need to fill in. the page names are highlighted with a warning to show they are incomplete. The warnings will disappear when the sections have all been completed.
Refer to the sections on accessibility and data protection for help completing these pages.
Previewing your form
The flow view includes a 'Preview' button in the top right-hand corner.
Previewing your form is a quick way to check how the form will look and work without needing to publish it. Most things in preview will behave identically to the final published form but there are a few limitations:
- a form in preview mode will not save any information entered into it or send any emails
- preview links cannot be shared and will work only for you
You can also preview individual pages without needing to go through the whole form page-by-page. To do this, open the page menu (...) and select 'Preview page'.
Adding pages
You can add pages to your form using the connection menu (+) that sits between each page in the flow view.
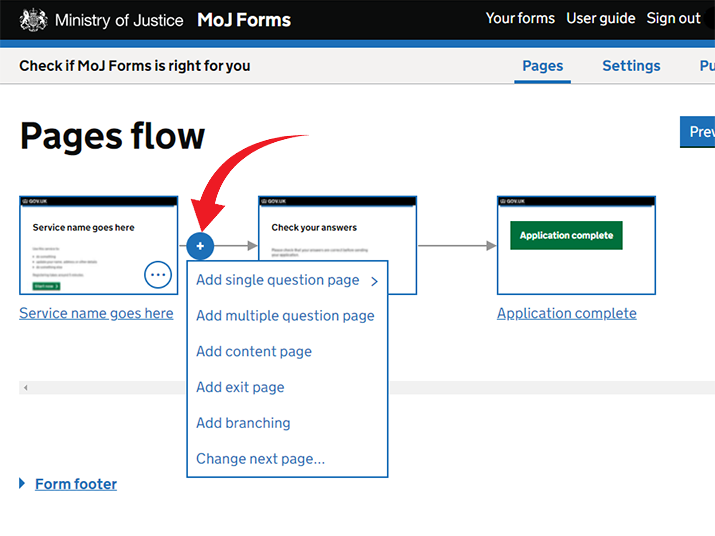
This menu enables you to select a new page from the range of available templates. See Choosing the type of page for details.
When you add a new page, you need to give it a name. This will be the page's URL slug so should be in lower case with no spaces or special characters. Separate words with hyphens. For example, in the following URL, the page name is 'your-details':
https://apply-for-a-dog-licence.form.service.gov.uk/your-details
Some names are reserved for global pages and you won't be able to use them:
- metrics
- ping
- health
- accessibility
- cookies
- privacy
- maintenance
- reserved
- dashboard
- admin
It is not currently possible to change the name of a page once you have created it.
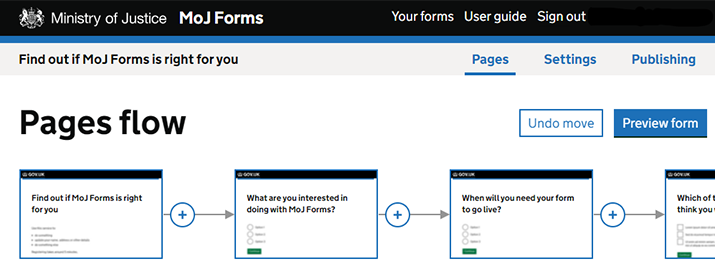
Moving pages
To move a page:
- open the page menu (...) and select 'Move page'
- in the modal that appears, select another page from the drop-down list - your page will be moved to directly after this selected page
You can move most pages in this way, including pages that have become unconnected. Branching points, check answers and confirmation pages can't be moved. In these cases, the move page option is not shown in the menu.
Undoing a page move
When you move a page, an 'Undo' button will appear alongside the preview button. Selecting undo will reverse the page move.
If you undo the page move, a 'Redo' button will appear allowing you to repeat the original page move.
If you perform any other action on your form, the option to undo or redo the page move will no longer be available.
Editing pages
You can open a page to edit in 2 ways:
- selecting the page directly
- opening the page menu (...) and selecting 'Edit page'
Most text on a page can be edited. Just select the text you want to change and start typing.
Some fields are required, like the page title, and others are optional. If a text area says it is optional, you don't have to delete it. The default text that appears in square brackets will be hidden in preview mode and when published.
Most text areas are set to a specific format, such as headings and hints. Text in content areas can be formatted using markdown.
Some text cannot be edited, including the 'Continue' buttons.
Deleting pages
You can delete a page from the form flow view by opening the page menu (...) and selecting 'Delete page'. This cannot be undone.
If you want to remove a page from your form without deleting it, you can move it to the unconnected pages section using the 'change next page' option.
Choosing the type of page
When adding pages, you can choose from the following templates:
Table: MoJ Forms page templates
| Type of page | What it's for |
|---|---|
| Single question page | Allows only one question per page. All question types are available. |
| Multiple question page | Allows any number of questions on a page. Most question types are available. |
| Content page | Use to provide users with information without asking any questions, such as advice about the application process or the task they are trying to accomplish. Allows text and markdown formatting but no questions. |
| Exit page | Use to tell users they do not need to continue with the form, for example if they are ineligible for your service. Allows text and markdown formatting but no questions. There is no continue button. Inserting an exit page will break the flow to any following pages and move them to the unconnected pages section. |
| Check answers page | A page that allows users to check their answers before they submit them. You will only see this option if you deleted your starting check answers page. A form can have only one check answers page. |
| Confirmation page | The final page of a form which lets the user know they have finished. You will only see this option if you deleted your starting confirmation page. A form can have only one confirmation page. |
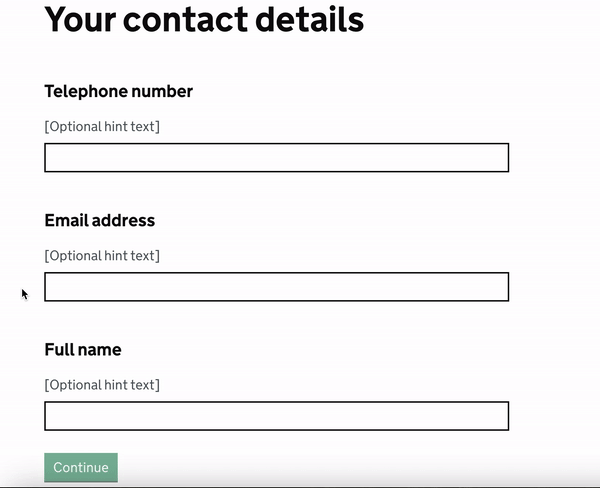
Single question or multiple question page?
GOV.UK forms and services are built around the principle of one thing per page. In general, this is the easiest approach for users and it helps you get the highest quality responses. When you plan out your form, start with one question per page using single question page templates and only combine them on multiple question pages when it makes sense to do so. For example, you might decide to ask for a user's contact details on one page which could include an email address and telephone number.
It's not possible to convert a single question page into a different question type - such as from radio buttons to check boxes. It's also not possible to switch an existing page between a single question or multiple question format.
Questions can be reordered on multiple question pages using the up and down buttons. These appear when you select the question title.
The autocomplete and file upload question types are only available as single question pages.
Choosing which question format to use
MoJ Forms has a wide range of question types. Picking the right format for your question will help ensure you get the highest quality responses from your users.
Text
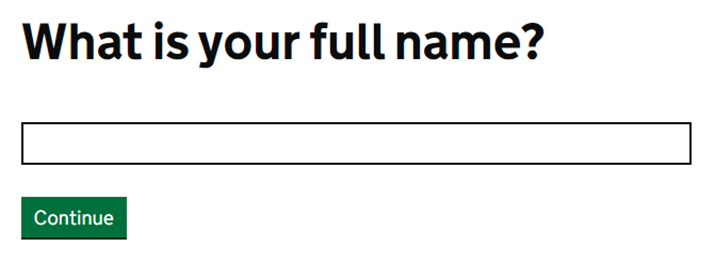
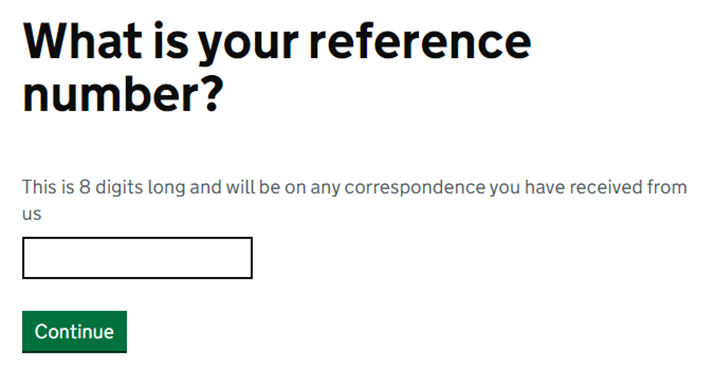
Use the text question type when you want the user to enter a small amount of text such as a name or phone number. If the user might want to enter more than one line of text, use the textarea question type instead.
This question type allows you to set a minimum and maximum number of characters or words for answers.
Textarea
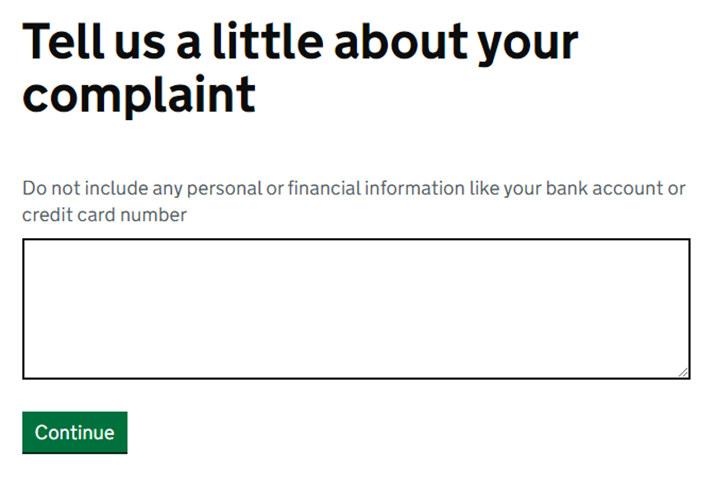
Use the textarea question type when the user might want to enter more than one line of text. Be clear and specific with your question and hint text so the user knows what is expected of them.
Don't use a textarea if there is a more structured way to collect the desired information using several questions.
This question type allows you to set a minimum and maximum number of characters or words for answers. With a maximum answer length, it shows a counter as the user approaches and passes the limit.
Email address
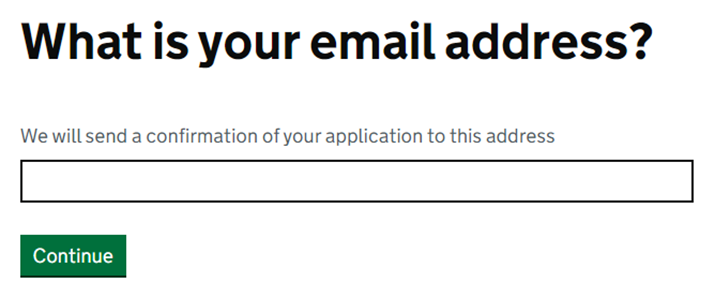
Use the email address question type to ask users for an email address. You must be clear why you are asking for it and how it will be used. (This should also be reflected in your privacy notice.) You must use this question type if you plan on sending users a confirmation email.
This question type automatically checks that the answer looks like an email address (e.g. it contains an @ symbol).
Number
Use the number question type to ask users for a number.
This question type automatically checks that the answer contains only numbers and decimal points. Letters, spaces and other characters are not permitted. For this reason, don't use this question type to ask for telephone numbers as users might use brackets, spaces and so on. Use a text question for telephone numbers instead.
This question type allows you to set a minimum and maximum value for answers. For example, only numbers up to 100 or numbers above 500.
Date

Use the date question type to ask users for a date that they are likely to know, such as their date of birth. If the user is unlikely to know the exact date there are better options, such as radio buttons offering users a choice or a text question allowing them to write in an answer.
This question type automatically checks that the days and months are valid possibilities. For example, a day can be up to 31 when the month is 1 but only 30 when the month is 9.
This question type allows you to set an earliest date and a latest date for answers. For example, only dates before 1 January 2000 or dates after 31 December 2001.
Address
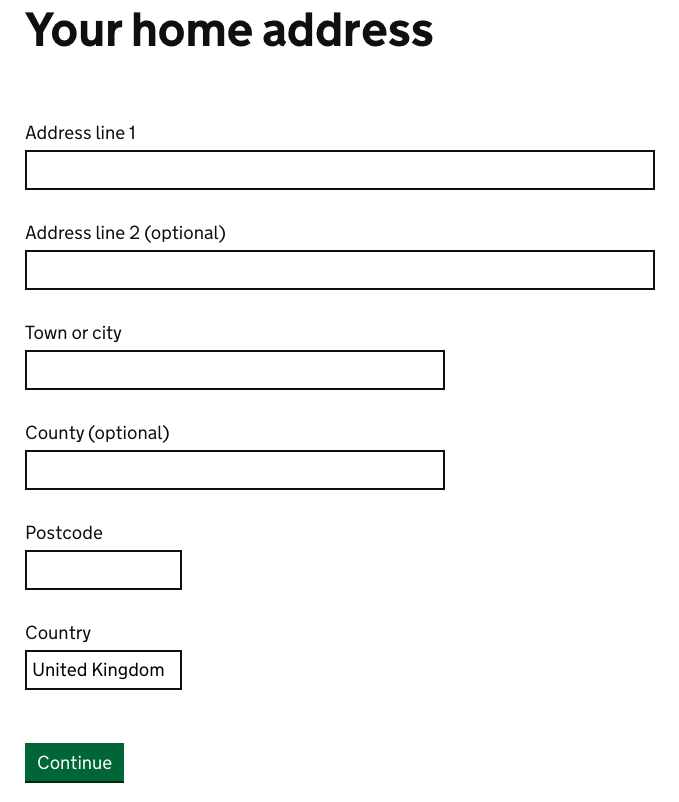
Use the address question type to ask users for a postal address.
This question type adds several text inputs in one block. The user can autofill it with any address information saved in their browser. The labels cannot be edited.
It is designed primarily for UK addresses and the country is prefilled with "United Kingdom". If the user keeps "United Kingdom" or replaces it with a UK country, such as England or Wales, the form will check if the postcode is in the proper format. It will not validate that the postcode is genuine or matches the address given.
Users may be able to use this question to enter an international address, for example by putting a zipcode in the postcode field. However, some users may struggle with this approach. You should test it with real users and decide whether it meets their needs or whether an alternative approach would work better. For example:
- if you know the address format of your users, you could use several text questions on a multi-question page with labels to match the format
- if you don't know the address format of your users, or it's likely to vary, you could use a text area question and allow the user to enter their address in their own way
If you create your own way to ask for an address, the user won't be able to autofill it with saved information from their browser.
Radio buttons
Use the radio buttons question type to ask a user to select a single answer from a list. If the user can select multiple options, use checkboxes instead.
If there are a lot of options, think about how they are ordered so a user can skim them easily and find the option that best fits.
If you want to offer an 'other' option, place this last. If you want the user to describe this other option, you can either:
- have an optional text or text area question beneath the radio buttons (using a multiple question page)
- use branching to take those users to another page where you can ask more about the other option
Checkboxes
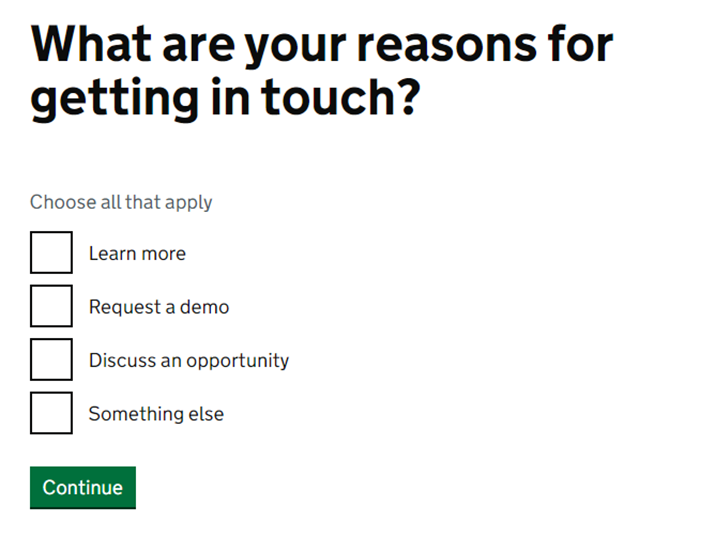
Use the checkboxes question type to allow users to select multiple answers from a list. If the user must select only a single option, use radio buttons instead.
If there are a lot of options, think about how they are ordered so a user can skim them easily and find the option that best fits.
If you want to offer an 'other' option, place this last. If you want the user to describe this other option, you can either:
- have an optional text or text area question beneath the radio buttons (using a multiple question page)
- use branching to take those users to another page where you can ask more about the other option
Autocomplete
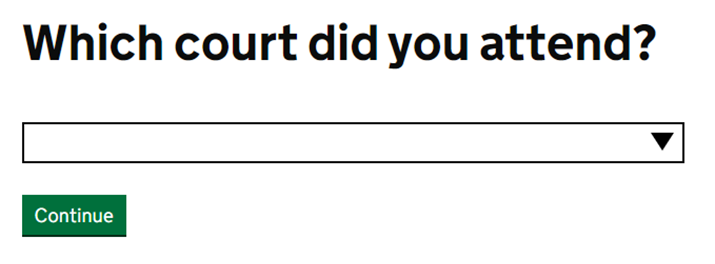
Use the autocomplete question type to help users select a single answer from a long list of options. The user can scroll through the list to select their answer or start typing to filter the options.
See the section on presenting users with a long list of options to learn more about how this question type works.
File upload
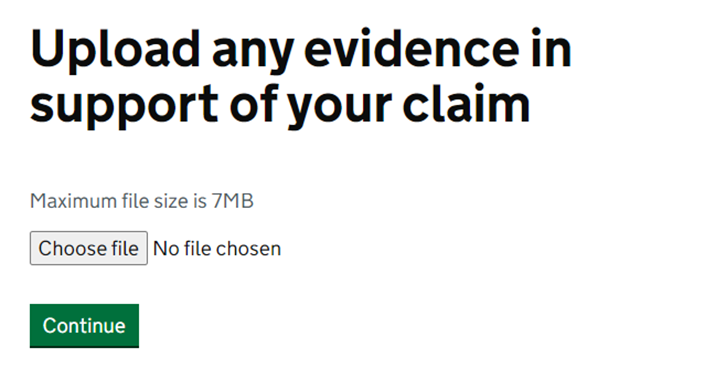
Use the file upload question type to ask a user to attach a file to their form. A user can attach up to 10 files of up to 7MB each per page.
See the section on asking users to submit a file to learn more about how this question type works.Presenting users with a long list of options
The autocomplete question type allows you to specify a large range of options for the user to choose from, such as a list of courts or locations. It looks like a text field with a black triangle, indicating a dropdown. When the user selects the answer field, a list of options appears. The user can scroll through the list to select their answer or start typing to filter the options. The form will only accept answers from the options specified.
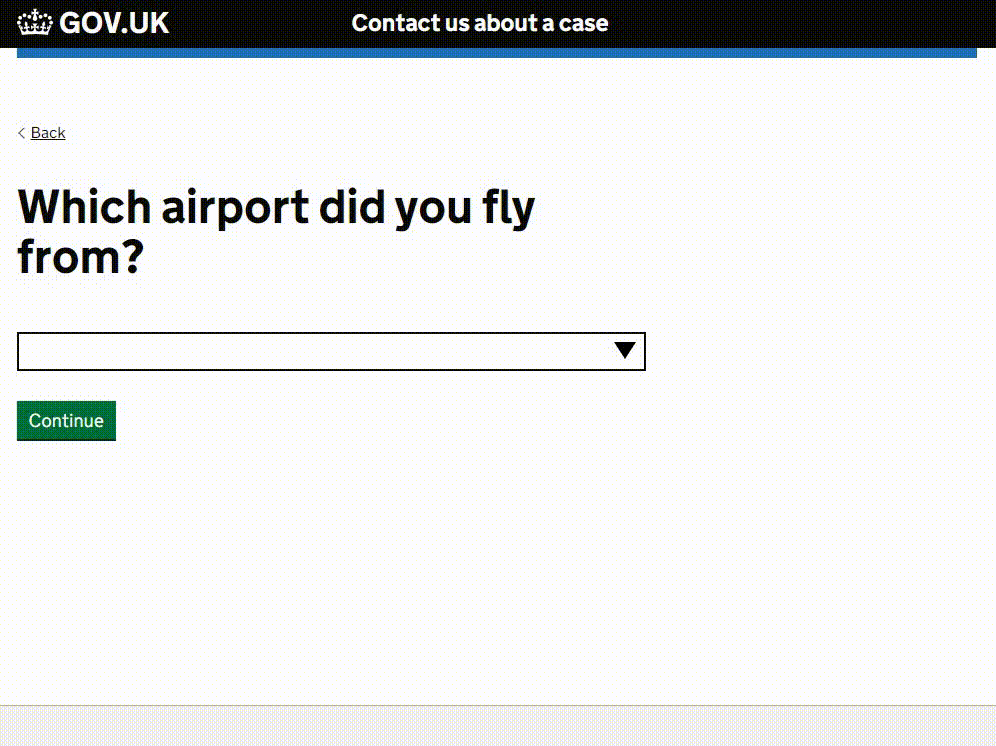
This format is best when there are a lot of options to choose from. Smaller numbers of options are better presented using radio buttons.
Formatting your autocomplete options
Your autocomplete options must be uploaded to MoJ Forms in a comma-separated values (CSV) file. This is a plain text format that many applications use for exporting data.
The easiest way to create your autocomplete options is with a spreadsheet such as Microsoft Excel or Google Sheets. List your options in a column with a heading of 'Text', like this:
| Text |
|---|
| Glasgow |
| London Gatwick |
| London Heathrow |
You can also include a second column of information with a heading of 'Value'. For example, you might want to associate a code or number with each option. This won't be shown in the question but will be shown instead of the text in the PDF and CSV submitted at the end. (If you don't provide values, the PDF and CSV will contain the text.) For example:
| Text | Value |
|---|---|
| Glasgow | GLA |
| London Gatwick | LGW |
| London Heathrow | LHR |
When entering your options, ensure that:
- you have either one or 2 columns of information
- the headings are exactly as shown here
- the options are ordered alphabetically
- there are no blank cells
Remember to save your options as CSV when you are ready to upload them to your form. (If your application gives you a choice of CSV types, use the standard “Comma-separated Values (.csv)” option.) There is a maximum file size of 1Mb.
Uploading your autocomplete options
To upload your options, open your autocomplete page in edit mode. Click in the question title to show the component menu (...) and select 'Autocomplete options'.
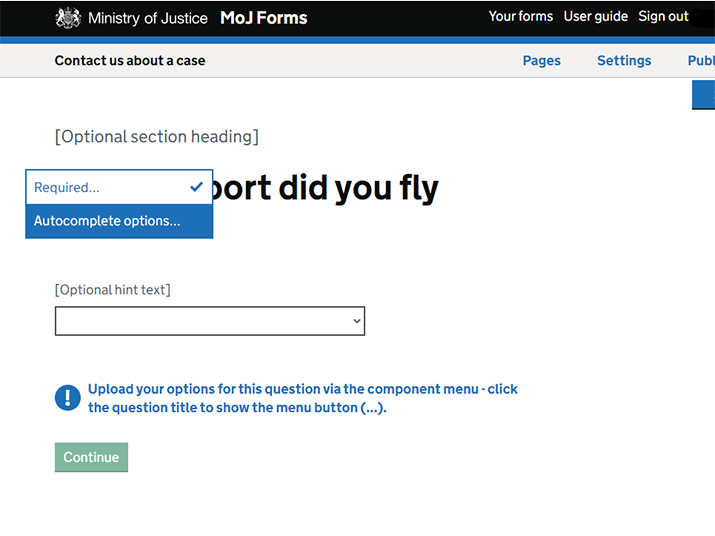
The page includes a warning message to indicate whether any options have been uploaded. After uploading, you won't be able to see your options on the page. You will need to save your changes and test them either in preview mode or after publishing to Test.
It's not currently possible to edit your options once they have been uploaded. To change the options, you will need to upload a new file.
Asking users to submit a file
The file upload question type allows you to ask users to attach files to their form.
By default, the question allows the user to attach only 1 file per page but you can increase this number up to a maximum of 10. This can be useful if:
- you don't know how many files the user might want to upload
- the user is likely to have several files of the same type, such as receipts or proofs of ID
In many cases, it may still be better to ask for files over several different pages, rather than all in one go. This approach enables you to be more explicit with the user about what they need to provide and ensure they provide all the required files.
To set a maximum number of files, select the question title to highlight the component settings button (...) and select "Number of files…"
MoJ Forms supports the following file formats up to 7MB in size:
- portable document format (.pdf)
- comma-separated values (.csv)
- images (.jpg, .jpeg, .png)
- MS Excel (.xls, xlsx)
- MS Word (.doc, .docx)
- Open Office (.odt, .ods)
- plain text (.txt)
- rich text (.rtf)
File names may be altered during the upload process to:
- remove any unsupported special characters such as ? and *
- remove any part of a file name that comes before a \ - for example, report\version1.doc would be renamed to version1.doc
- differentiate any identically named files with a number - for example, instead of several documents all named document.xls, you would receive document.xls, document-(1).xls, document-(2).xls and so on
Making a question optional
When a question is required, the form will check that the user has provided an answer before moving to the next page. If they haven't, it will show an error message and prompt the user to complete the question.
All questions are required by default but you can switch this setting off to make a question optional. This can be done with both single question pages and individual questions on multi-question pages.
To make a question optional, select the question title to reveal the component settings button (...).
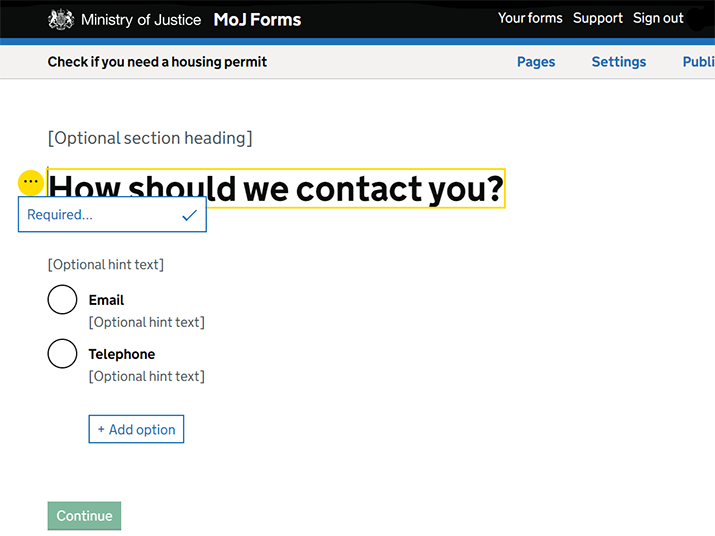
Select 'Required' from the menu and choose 'Yes' for required or 'No' for optional.
MoJ Forms automatically adds '(optional)' onto the end of the title of any question that isn't required.
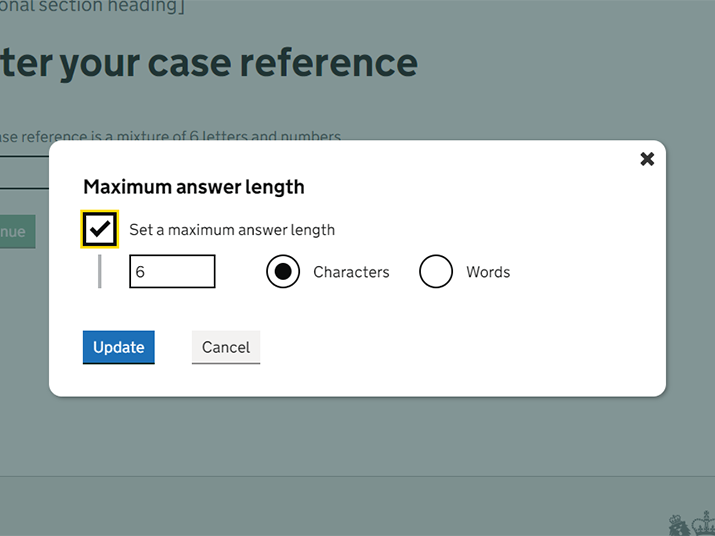
Validating user answers
You can set validation criteria for a range of question types, allowing you to specify things like the length or limits of an answer. When validation is present, the form will check the user's answers before moving to the next page and show an appropriate error if required.
The full range of options available are shown in this table:
Table: validation options
| Validation | Available with | What it does |
|---|---|---|
| Minimum answer length | Text Text area |
Sets the minimum number of characters (or words with text area) that will be accepted |
| Maximum answer length | Text Text area |
Sets the maximum number of characters (or words with text area) that will be accepted |
| Minimum answer value | Number | Sets the lowest number that will be accepted |
| Maximum answer value | Number | Sets the highest number that will be accepted |
| Earliest date | Date | Sets the earliest date that will be accepted |
| Latest date | Date | Sets the latest data that will be accepted |
| Specific answer format (regex) | Text Textarea |
Allows use of regular expressions (regex) to specify a format such as a reference number or case ID |
| Maximum number of files | File upload | Sets the maximum number of files that can be uploaded to that page |
To set validation, select the question title to reveal the component settings button (...) and open the menu. Validation options are listed in the menu.
About regular expressions
A regular expression (regex) is a way of defining a pattern of characters. When you apply this to a question, the form checks if an answer matches that pattern.
For example, you might want to ask your users for a case reference that can be 8 to 11 letters long. The regex for this would look like:
[a-z]{8,11}
Regex 'options', which allow some additional flexibility, are not currently supported.
Regex uses programming language and can get quite complex, depending on what you want it to do. For this reason, we recommend that you get help from an expert, such as a developer, to write it for you.
There is always a risk when using a regex that you might inadvertently prevent some users from being able to complete your form. This can happen if you make a mistake in the regex or if you apply a pattern that doesn't work for all of your users.
MoJ Forms does not check to see if your regex is working correctly when applying it. You can check if your regex matches a particular answer using an online editor such as Rublar. You should also conduct proper testing with users.
Formatting content with markdown
In most cases, you won't have to worry about formatting. The page templates include fields for headings, labels and hint text and all you have to do is add your own words.
Content areas allow you to use markdown to add your own formatting. These are on every content page and can be added to some other page templates as required.
Markdown is a way of adding formatting to plain text using basic symbols and patterns. With markdown, you can add headings, links, lists, tables and more. For example, to create a bulleted list, you start each item with an asterisk (*). MoJ Forms supports the following markdown styles.
Table: markdown formatting
| Formatting | Markdown | Example |
|---|---|---|
| Headings | Put 2, 3 or 4 hashtags at the beginning of your header, depending on the level of heading you need. | ## Level 2 heading ### Level 3 heading #### Level 4 heading |
| Bold | Put the words you want to make bold inside double asterisks. | make **these words** bold |
| Italic | Put the words you want in italics inside single asterisks. | make *these words* italic |
| Bullets | Put an asterisk (or a hyphen) at the start of each item in your list and leave blank lines at the beginning and end of the list. | Bulleted lists look like this: * list item 1 * list item 2 * list item 3 |
| Numbering | Put a number with a full stop and space at the start of each item and leave blank lines at the beginning and end of the list. | Numbered lists look like this: 1. list item 1 2. list item 2 3. list item 3 |
| Web links | Put the link text in square brackets followed immediately by the link url in round brackets. | [link to GOV.UK](https://www.gov.uk/) |
| Email links | Put 'less than' and 'greater than' signs around the email address. | <email@address.com> |
| Tables | Use dividers (or 'pipes') to split your content into columns and start each row on a new line. Make sure each row has the same number of columns. Put hyphens in the second row to make the first row a header row. Leave blank lines at the beginning and end of the table. | 2 columns: | Header 1 | Header 2 | | -------- | -------- | | Cell | Cell | | Cell | Cell | 3 columns: | Header 1 | Header 2 | Header 3 | | -------- | -------- | -------- | | Cell | Cell | Cell | | Cell | Cell | Cell | |
| Call to action | Put $CTA on the lines before and after the text you want in the box. | $CTA This markdown creates a tinted box. You can use it to highlight important links and information. $CTA |
| Inset text (information callout) | Put ^ before and after the text you want to inset. | ^This indents text and can be used to highlight useful information.^ |
| Warning text (warning callout) | Put % before and after the text you want in the warning. | %This adds a warning icon and can be used to highlight something important.% |
| Contacts | Put $C on the lines before and after your contact details. Add 2 spaces at the end of each line within the contact details. | $C Email: contact.us@team.gov.uk Telephone:01234 555666 Monday to Friday, 8am to 5pm $C |
| Addresses | Put $A on the lines before and after your address. Add 2 spaces at the end of each line within the address. | $A Ministry of Justice 102 Petty France London SW1H 9AJ $A |
Targeting content with visibility
Visibility is what we call being able to show users different blocks of content based on their previous answers. With visibility, you can change or hide some of the content on the page for different users.
It's also a really powerful tool for creating 'smart answer' services where you ask the user a series of questions and provide information tailored to their answers. Visibility allows you to use a single information page to serve dozens of different combinations of answers.
Visibility is a setting on all content areas - the text boxes that allow you to add paragraphs of content and use markdown formatting. These are on content pages, exit pages, the confirmation page and a number of other page templates.
Visibility allows you to set a content area to show:
- always (the default setting)
- never
- only if…
With "only if…" you set the conditions under which the content area will show. For example, only show if a user answered yes to a previous question or selected a specific option. Like branching, visibility rules can only be based on radio button or checkbox questions.
Setting a content area's visibility
To set the visibility of a content area, select the content area to highlight the component settings button (...) and open the menu. Select "show if…" to open the settings window and choose between the 3 options (show always, only if… or never).
When you select "only if…", the window will expand to allow you to input your conditions.
A condition consists of:
- the question that the visibility will be based on
- an operator - such as 'is' or 'is not'
- the user's answer
For example, a condition could be:
- question - what is your favourite colour?
- operator - is
- answer - red
In this example, the content area would only show to users who said red was their favourite colour.
A content area can have as many conditions as you need.
A page will show all content areas in the MoJ Forms editor and when you preview the individual page, regardless of visibility settings. That's because you need the relevant answers to previous questions for the settings to apply. To check how a page will appear to users, you will need to start your form from the beginning, either in preview or when published to Test.
Translating a form into Welsh
It's possible to create a separate version of a form for Welsh-language users.
You will need to:
- contact us to create a copy of your form
- arrange the translation yourself
- update the copy of your form with the translated text
- add links to the start pages of the English and Welsh forms allowing users to switch between languages
- keep both versions in sync if you make any changes
The MoJ Forms team maintains translations of wording present in the form's template, such as button text and error messages. When we create the Welsh version of your form, we ensure this content also appears in the appropriate language.
Following this approach, the 2 versions of your forms will be completely separate and users will be unable to switch between the languages during completion.